

Troubleshooting Failed DIY Biology Experiments: A Practical Guide
Welcome, friend. If you’re reading this, I’m guessing you just stared at a petri dish full of absolutely nothing, watched a gel run with zero bands, or opened an incubator to find a smell that definitely wasn’t science.
I’ve been there, more times than I’d like to admit. Troubleshooting DIY biology experiments isn’t a sign you’re bad at this; it’s the secret handshake of the home lab world.
Every single biohacker, from kitchen-sink tinkerers to garage geneticists, has faced a mysteriously dead culture or a DNA extraction that yielded the ghost of a pellet. The trick is learning to diagnose what went wrong, fix it, and build a more resilient setup.
In this guide, I’ll walk you through the exact steps I use, keeping everything rooted in a safe home lab setup and a compliant DIY bio lab ethos. Grab a cup of tea, and let’s turn those failures into breakthroughs.
The Mindset for Troubleshooting DIY Biology Experiments
Before we touch a single test tube, let’s talk about the voice in your head. When an experiment flops, the natural reaction is frustration, maybe even a spiral of “I’m not cut out for this.” Push that aside.
Every failed plate is a data point. Troubleshooting DIY biology experiments becomes genuinely fun when you treat it like detective work. The bacteria aren’t judging you; they’re just responding to their environment.
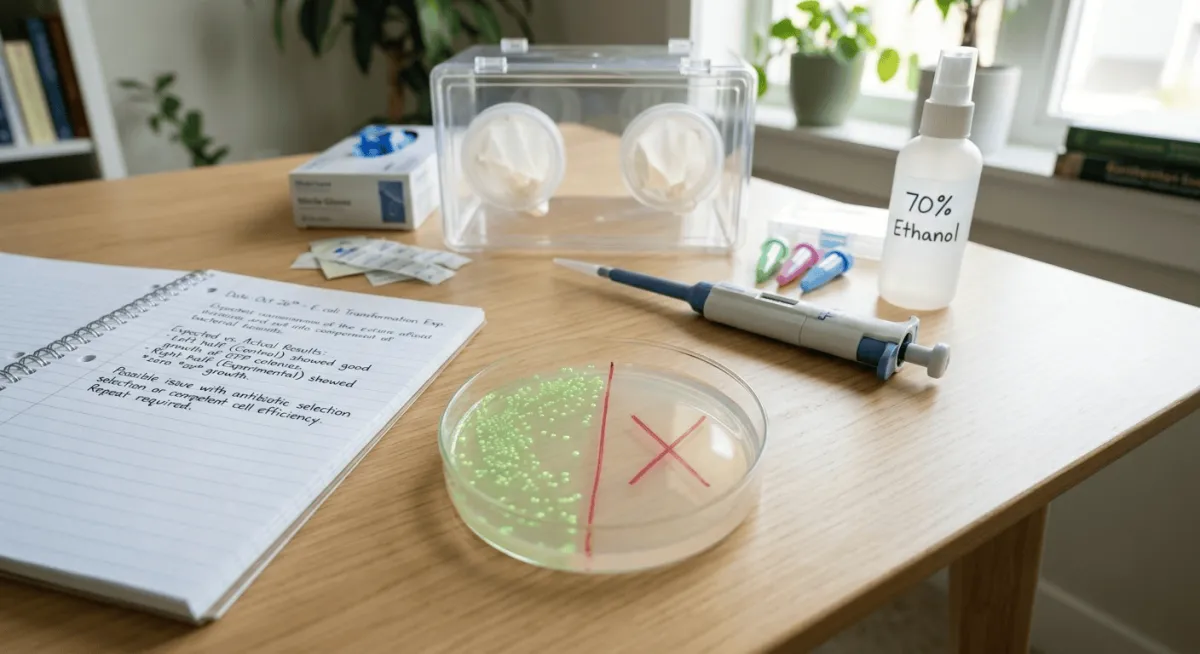
Start by asking, “What was supposed to happen, and what did I observe instead?” Write that down. Yes, right now. A simple two-column “Expected vs. Actual” list in your lab notebook will save you hours of head-scratching later.
This habit alone is the single most powerful troubleshooting tool you’ll ever have.
If you haven’t started a lab notebook yet, check out our guide on setting up a compliant DIY bio lab workflow, it covers exactly how to log experiments for both safety and success.
Safety First: A Safe Home Lab Setup Prevents Failures
It might seem odd to start a troubleshooting article with safety, but hear me out. Many “experimental failures” are actually safety incidents wearing a lab coat.
A contaminated culture could be harmless, but it could also harbor something you inadvertently enriched from your kitchen sponge. A safe home lab setup isn’t just about protecting yourself; it directly impacts the reliability of your results.
If you’re working on a cluttered desk next to a sandwich, you’re inviting cross-contamination that kills your experiments.
Start with the basics: a dedicated surface that’s easy to disinfect, like a plastic-coated table or a sheet of bench liner.
Always have a spray bottle of 70% ethanol or a 10% bleach solution within reach. Use gloves, and change them often, especially after touching your phone, doorknob, or face.
If you’re working with any organism beyond GRAS (Generally Recognized As Safe) strains, you absolutely need a compliant DIY bio lab approach: think waste disposal protocols, a basic biosafety manual, and an understanding of local regulations.
The CDC’s Biosafety in Microbiological and Biomedical Laboratories (BMBL) is a free, trusted resource that walks you through risk assessment for small labs. A clean, well-organized space makes troubleshooting DIY biology experiments infinitely easier because you can eliminate a whole category of “is it contamination?” guesswork right away.
Common Culprits: Why Your DIY Bio Experiment Flopped
Let’s look at the most frequent reasons experiments go sideways, in order of how often I see them in home labs:
Contamination (bacteria, fungi, or cross-strain mixing).
Incorrect media or reagent preparation (wrong pH, expired antibiotics, forgotten ingredients).
Temperature swings (incubator not calibrated, water bath too hot, room too cold for slow-growing organisms).
Equipment mishaps (pipette out of calibration, faulty power supply for electrophoresis, UV lamp gone dim).
Human error (mislabeling, adding the wrong volume, skipping a step because you’ve “done it a hundred times”).
Notice that almost all of these are solvable with better systems, not more expensive gear. As you go through each troubleshooting round, keep a running list of which culprit you suspected and what evidence you found.
This list will become your personalized “failure library,” and it’s pure gold for future experiments.
Troubleshooting DIY Biology Experiments: Sterility and Contamination
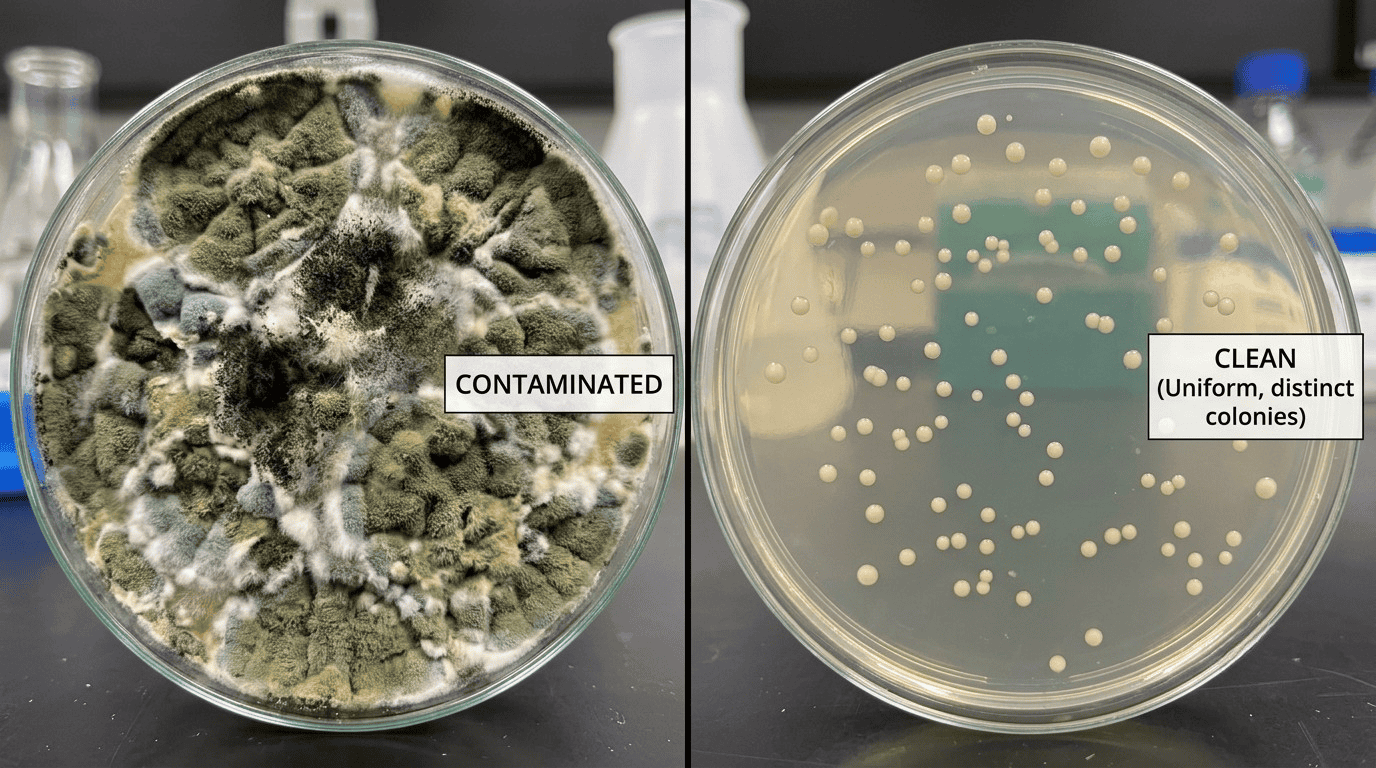
Let’s get specific. You streak a plate with E. coli expressing GFP, incubate overnight, and wake up to a fluffy white carpet of mold, or a rainbow of colonies that definitely aren’t your strain. Contamination is the number-one heartbreak in troubleshooting DIY biology experiments.
First, identify the invader. Mold usually looks fuzzy, raised, and may come in green, black, or white. Bacterial contaminants often appear as tiny off-color colonies.
If you’re working with a specific antibiotic-resistant strain, and you see growth but it doesn’t glow, your antibiotic might be expired or you forgot to add it.
Check the stock solution date: ampicillin and kanamycin degrade over time, especially if not stored properly.
Now, trace the breach. Did you flame your inoculation loop thoroughly? Did you work near an open window, or breathe directly onto the plate?
In a safe home lab setup, I recommend a simple still-air box, a clear plastic tote with armholes cut into it, that can dramatically reduce airborne contamination without costing a fortune.
We’ve got a whole post dedicated to building your own still-air box and keeping it sterile, because good technique is the heart of a compliant DIY bio lab.
Action steps: Re-make your media if contamination persists, autoclave or pressure-cook your solutions properly (15 psi at 121°C for at least 15 minutes for liquids), and practice aseptic technique with a mock run, just moving colored water between tubes inside your still-air box until it becomes second nature.
When Your Cultures Won’t Grow: Media and Temperature Fixes
The opposite of contamination is the dreaded clear plate. You incubated for two days, and nothing. Let’s play detective.
First, ask: is your organism even alive? If you streaked from a glycerol stock that’s been through multiple freeze-thaw cycles, viability may have tanked.
Streak a fresh stock onto a non-selective plate as a positive control. If that grows, your selective media is the problem.
Did you add the right amount of agar? Too much agar can make the surface dry; too little and it’s soup. Is the pH off? Many bacteria need a pH between 6.5 and 7.5.
Test with narrow-range pH strips after autoclaving, your medium can change during sterilization.
Temperature is another silent killer. That repurposed egg incubator might say 37°C, but have you verified it with a separate thermometer placed exactly where your plates sit?
A 2–3°C discrepancy can double a microbe’s doubling time or halt it altogether. For yeast and mammalian cell culture, the stakes are even higher.
In a safe home lab setup, I tape a calibrated digital thermometer probe to the inside shelf of my incubator and check it daily.
If your cultures consistently underperform, incubate a few plates in different spots and record the temperature gradient. You might just need to rotate your plates or add a small fan for even heat distribution.
Don’t forget oxygen. If you’re growing anaerobic organisms without an anaerobic chamber, they’re simply suffocating. A candle jar (a sealed jar with a lit candle that consumes oxygen) can work for microaerophiles, but it’s not true anaerobiosis.
Know your bug’s needs. I once spent three weeks troubleshooting a “failure” only to realize my Bacillus species needed aeration at 30°C, not a static 37°C. A quick literature check would have saved me a lot of grief.
DNA Extraction and PCR Troubles: Practical Fixes
If your experiment involves DNA extraction, PCR, or gel electrophoresis, the troubleshooting path shifts a bit. Let’s start with extraction. You followed the protocol, but your final pellet is invisible, or your nanodrop (or DIY spectrophotometer) reads zero.
A safe home lab setup for DNA work requires a dedicated, clean zone free of nucleases. If you’re extracting from fruit, bacteria, or your own cheek cells, ensure you use a lysis step long enough.
Sometimes the tissue isn’t ground finely enough. For Gram-positive bacteria, you may need a lysozyme pre-treatment that isn’t in the standard kit.
If you see a pellet but it doesn’t resuspend, your DNA might be contaminated with proteins or salts. Wash it again with 70% ethanol, spin, and let the pellet air-dry completely before adding TE buffer or water.
Also, check the expiration of your proteinase K and RNAse; enzymes don’t last forever, even in the freezer.
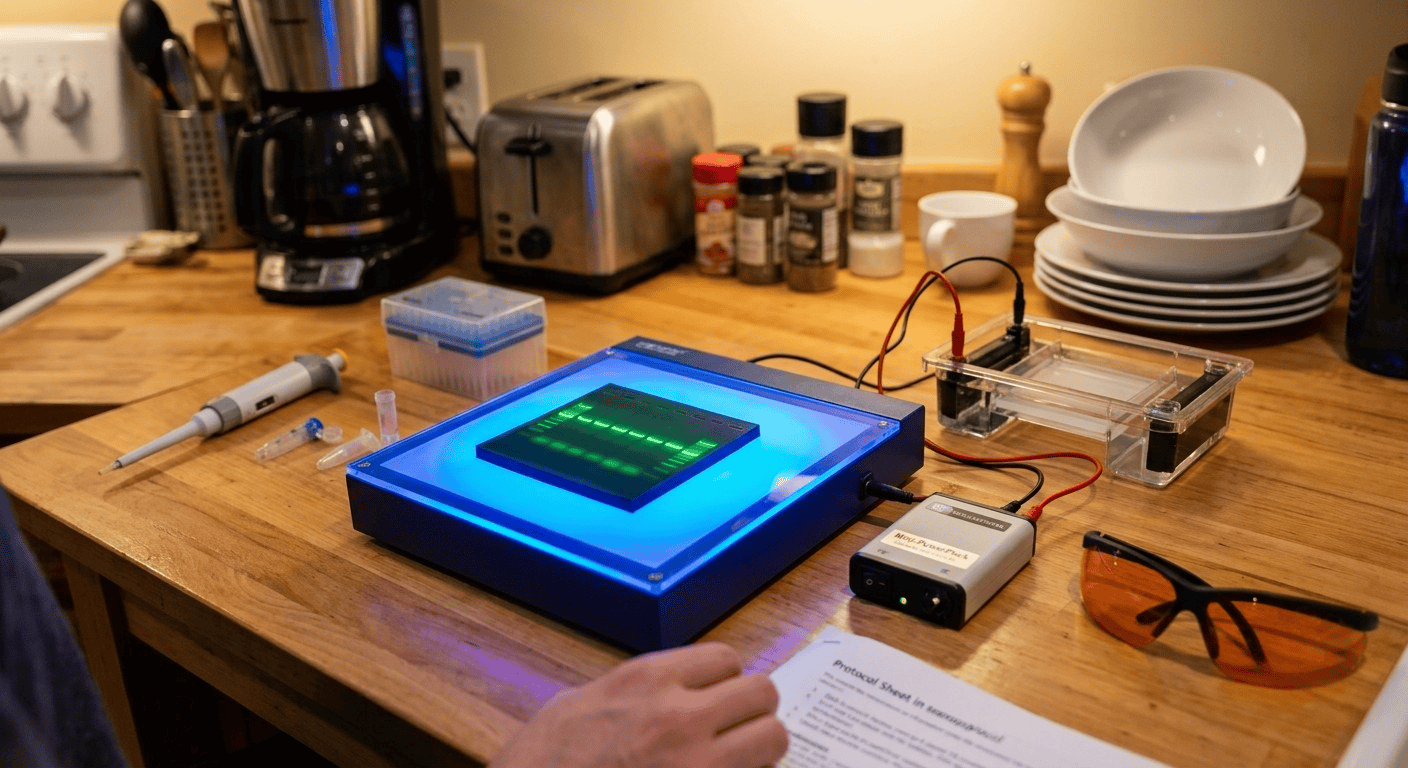
Now, PCR: the no-band mystery. First, run your PCR product on a fresh gel with a known ladder and a positive control template that worked before.
If the control amplifies, your sample template is suspect, too little, degraded, or full of inhibitors (ethanol, EDTA, or plant polyphenols).
Dilute your DNA 1:10 and try again; sometimes inhibitors are concentrated. If no bands appear at all, even in the positive control, check your reagents.
Are the dNTPs and primers properly thawed and mixed? Did you accidentally leave the Taq polymerase at room temperature for a day? That little enzyme is forgiving, but not immortal.
Primer design can also be the culprit. If you’re troubleshooting a PCR that suddenly stopped working, re-check your primer sequences for secondary structure or dimers using a free tool like the IDT OligoAnalyzer.
Finally, your thermocycler’s lid may not be heating properly, leading to condensation that alters reaction volume. In a DIY lab where equipment is often salvaged, this is more common than you’d think.
A compliant DIY bio lab practice is to validate your thermocycler with a simple water-bath test or a commercial temperature verification strip at least twice a year.
Equipment Calibration and DIY Lab Hacks That Actually Work
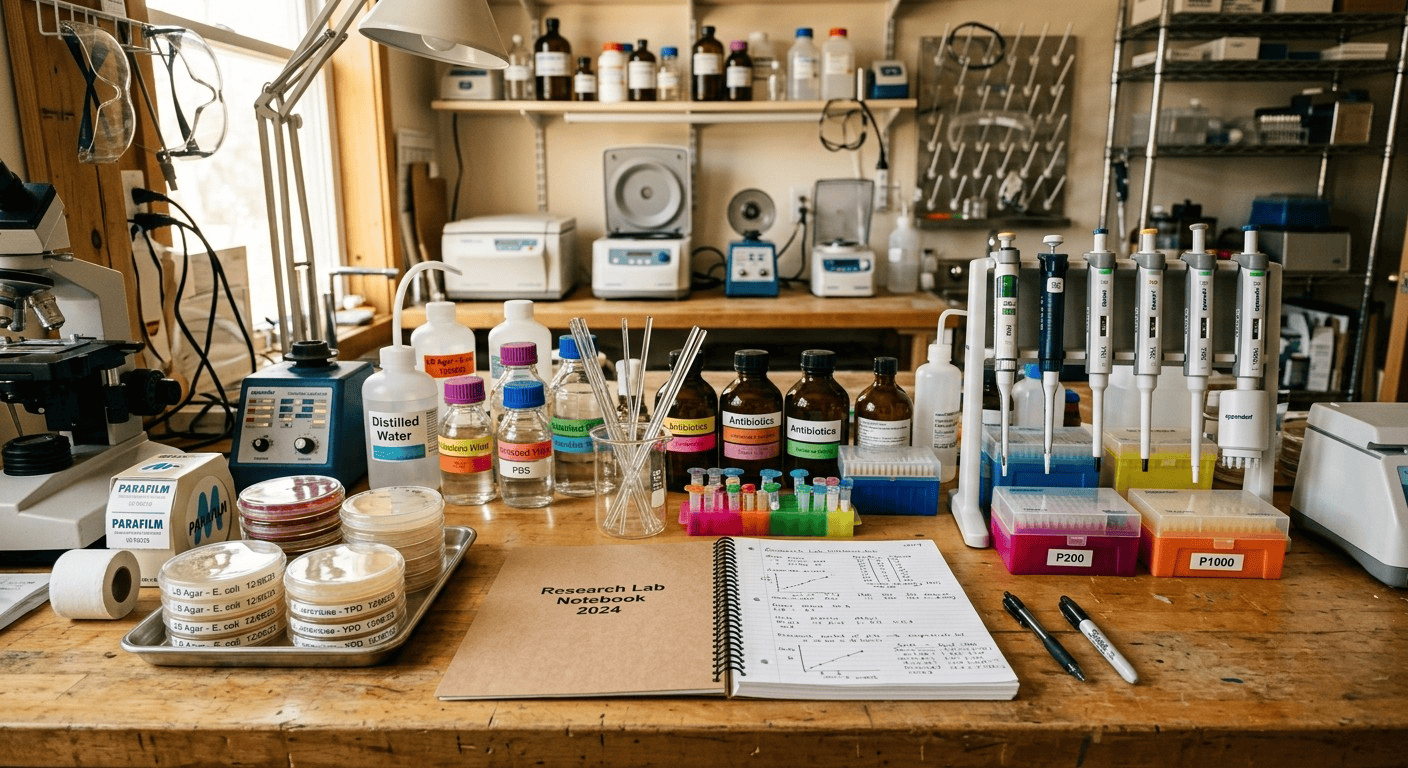
I’m a big believer that you don’t need a $5,000 pipette to do good science, but you do need to know what your gear is actually doing. In troubleshooting DIY biology experiments, misbehaving equipment masquerades as biological failure all the time. A few quick checks:
Pipettes: Test accuracy with water and a cheap milligram scale. 100 µL of distilled water should weigh 0.100 g at room temperature. If it’s off by more than 2%, your volumes are skewing every reaction. Cleaning and recalibration kits are affordable.
pH meter: Store it properly, calibrate before each use with fresh buffers, and don’t let it dry out.
Autoclave/Pressure Cooker: Use biological indicators (spore strips) once a month to confirm your sterilization cycle actually kills Geobacillus stearothermophilus. Strips are inexpensive and give you peace of mind that your media is truly sterile.
Centrifuge: A wonky balance can shear DNA or leave cells intact. Always counterbalance tubes by mass, not volume, and listen for excessive vibration.
For those on a budget, we have an entire resource on stretching your dollar without sacrificing safety, check out “Building a Compliant DIY Bio Lab on a Shoestring.”
A safe home lab setup thrives on routine maintenance. I dedicate ten minutes at the start of every lab session to wipe down surfaces, check my temperature logs, and calibrate one piece of equipment on a rotating schedule.
It feels like a chore, but it prevents the kind of failures that leave you staring at a failed experiment at midnight.
Building a Compliant DIY Bio Lab That Supports Success
A compliant DIY bio lab isn’t about red tape; it’s about building a system that works and doesn’t pose a risk to you, your family, or your community.
Whether you’re just growing baker’s yeast or doing CRISPR-Cas9 transformations in your garage, a few clear boundaries keep you on the right side of ethics and local rules.
This directly feeds into troubleshooting DIY biology experiments because a well-run lab generates reliable, reproducible data.
Start with a safety manual, a single page is fine. List the organisms you work with, their biosafety level (BSL-1 is typical for most DIY projects), and the waste inactivation method you use.
For example, all bacterial cultures get a 10% bleach treatment for 20 minutes before disposal. Have a spill kit: paper towels, gloves, and disinfectant in a dedicated spot. Know where your fire extinguisher is and how to shut off power in an emergency.
The DIYbio community has a wonderful, freely shared “Ask a Biosafety Officer” forum where you can get guidance on your specific situation.
Also, think about compliance with intellectual property and responsible innovation. If you’re building on someone else’s published protocol, that’s great, just don’t release genetically modified organisms into the environment.
That’s a hard line. When your troubleshooting DIY biology experiments uncovers a persistent contamination issue that might be environmental, a compliant lab has the documentation to figure out if it’s coming from your water source, air, or a contaminated stock culture.
This record-keeping habit is something I cover deeply in “From Notebook to Breakthrough: Documentation in the Home Lab.”
The Power of Documentation in Troubleshooting DIY Biology Experiments
I’ve mentioned notebooks a few times, but let’s really dig in. When you’re stuck, your lab notebook is a time machine. You can go back and see that you used a different brand of agar that day, or the humidity was unusually high.
Those details matter. I once lost a month to an experiment that only worked on Tuesdays, turns out the building’s water softener regenerated on Monday nights, and the residual softener was inhibiting my enzyme.
I caught it because I’d scribbled “water tastes salty today” in my notes.
Create a troubleshooting log specifically for troubleshooting DIY biology experiments. Each entry should have:
Date and experiment ID.
What you observed (be brutally honest, e.g., “looked like snot, not a pellet”).
What variables you changed.
Result of that change.
Next question.
Over time, you’ll start spotting patterns. Maybe your fungal contaminations always happen in summer when the window AC kicks up dust. Maybe your PCR fails every time you use a certain batch of primers.
These insights are the difference between feeling like a failure and becoming a master debugger of living systems.
When to Ask for Help (and When to Toss It)
Here’s something they don’t tell you in textbooks: not every experiment can be saved, and that’s okay.
If you’ve gone through three full rounds of methodical troubleshooting, changing one variable at a time, not ten, and still see the same baffling result, it might be time to start fresh with new reagents, new stocks, and a clean slate.
Sometimes the ghost in the machine is an invisible contaminant that’s just not worth chasing, like a phage that’s lysing your bacterial cultures overnight. A safe home lab setup means knowing when to cut your losses and decontaminate the entire workspace.
However, if you’re truly stuck and the experiment matters, reach out. The DIYbio community on forums, Reddit’s r/DIYbio, and local biohacker spaces are incredibly generous.
Describe your issue clearly, share your controls, and ask specific questions. You’ll be amazed how quickly someone who’s made the exact same mistake can point you to the solution.
And if you’re working in a compliant DIY bio lab, you can share your documentation without worrying that you’ve been cutting corners on safety. Remember, asking for help is a sign of rigor, not weakness.
Key Takeaways for Troubleshooting DIY Biology Experiments
Adopt a detective mindset: document expected vs. actual outcomes.
A safe home lab setup prevents a majority of failures, disinfect, use a still-air box, and keep equipment calibrated.
Contamination, temperature, media errors, and equipment drift are the top culprits; change only one variable at a time.
For molecular work, check reagent integrity, primer design, and thermocycler performance.
A compliant DIY bio lab with clear safety and documentation protocols makes troubleshooting systematic rather than chaotic.
Maintain a dedicated troubleshooting log, and don’t hesitate to ask the community when a problem becomes a puzzle.
Sometimes the best fix is a fresh start with new materials and a thoroughly cleaned lab.
Now I’d love to hear about the experiment that’s been driving you crazy. What did it look like? What did you try?
Whether you’re wrestling with a stubborn transformation or a gel that refuses to shine, you don’t have to debug alone. Drop me a line and we’ll figure it out together.
Contact us at [email protected] with your questions, photos, or just to share a win. Let’s keep this community growing safely and brilliantly.