

The Best Budget pH Meters and Sensors to Supercharge Your Home Bio-Lab
Hey there, fellow kitchen scientist! If you’re reading this, you’ve probably reached that glorious (and slightly chaotic) stage of your home bio-lab journey where you realize that guessing the pH of your latest concoction just isn’t cutting it anymore. I’ve been there, squinting at a strip of litmus paper under bad kitchen lighting, trying to decide if it’s “salmon pink” or “coral pink,” while my sourdough starter stares at me judgmentally. That’s when I first started hunting for budget pH meters that wouldn’t require me to sell a kidney, but were still accurate enough to tell me if my ferments were safe or my plant nutrient solution was about to nuke my lettuce.
Today, I’m sharing everything I’ve learned about cheap pH sensors and home bio-lab sensors that actually work. We’ll cover what to look for, which models punch above their weight class, and how to keep them alive longer than a fruit fly culture. So grab a coffee (or your latest kombucha experiment), and let’s get into it.
Why You Need a pH Meter in Your Home Bio-Lab
If you’re into home brewing, hydroponics, mushroom cultivation, biohacking, or even just making your own skincare, pH isn’t a “nice to know”, it’s mission-critical. The acidity or alkalinity of a solution directly impacts enzymatic reactions, microbial growth, nutrient availability, and the final taste or safety of your project.
Litmus paper can be fine in a pinch, but it’s subjective, slow, and useless in colored liquids. Budget pH meters give you a digital reading in seconds, often with resolution down to 0.01 pH, letting you adjust on the fly.
For home bio-lab enthusiasts, integrating home bio-lab sensors like a cheap pH sensor into a monitoring system can be a total game-changer. Imagine logging pH drift over a 48-hour fermentation and getting alerted when it strays.
That’s citizen science at its finest. A good cheap pH sensor will also make you a better experimenter, you’ll start seeing patterns and get reproducible results. And the best part? You don’t need a $300 lab-grade probe to do meaningful work. We’ll prove it.
What to Look for in Budget pH Meters (Without Getting Lost in the Specs)
Before we dive into the list, let’s break down what matters when you’re spending under $50. I want you to feel confident reading the jargon so you don’t get seduced by a gadget that’s all plastic and no performance.
Accuracy and Resolution: For most home bio-lab work, ±0.1 pH accuracy is perfectly adequate. If you can get ±0.05 pH in a cheap unit, you’re golden. Resolution of 0.01 pH is nice but not essential unless you’re doing fine titration.
Calibration: Look for at least two-point calibration (pH 4.01 and 6.86 or 7.00). Three-point (adding 9.18 or 10.01) is better for alkaline work. Single-point calibration is a red flag, run away.
Electrode Type: Most cheap meters use a single-junction Ag/AgCl electrode. They work but can clog in protein-heavy samples. If you see “double-junction” on a budget unit, snag it, it resists contamination.
Automatic Temperature Compensation (ATC): pH readings change with temperature. ATC adjusts for that. Any meter you buy must have ATC.
Build and Probe Replacement: Some budget meters have a non-replaceable probe, once it dries out or dies, the whole thing is trash. That’s okay for a $15 tool, but if you’re spending $40, check if you can swap the probe.
Response Time: Should be stable within 30 seconds. Cheaper sensors can be sluggish, especially in low-ionic-strength solutions like rainwater or distilled water.
If you’re looking to integrate home bio-lab sensors directly with Arduino or Raspberry Pi, you’ll need a different beast, a bare cheap pH sensor module with an analog output, not a handheld meter. We’ll talk about those later.
(Internal link opportunity: For more on building a monitoring rig, check out our post on [DIY Lab Monitoring Systems for Home Biology])
Top 5 Budget pH Meters That Won’t Let You Down
I’ve tested quite a few of these myself, yelled at some, praised others, and read hundreds of verified reviews. Here’s my shortlist of budget pH meters that deliver solid value for home bio-lab work. Note: prices fluctuate, but all were under $50 at the time of writing.
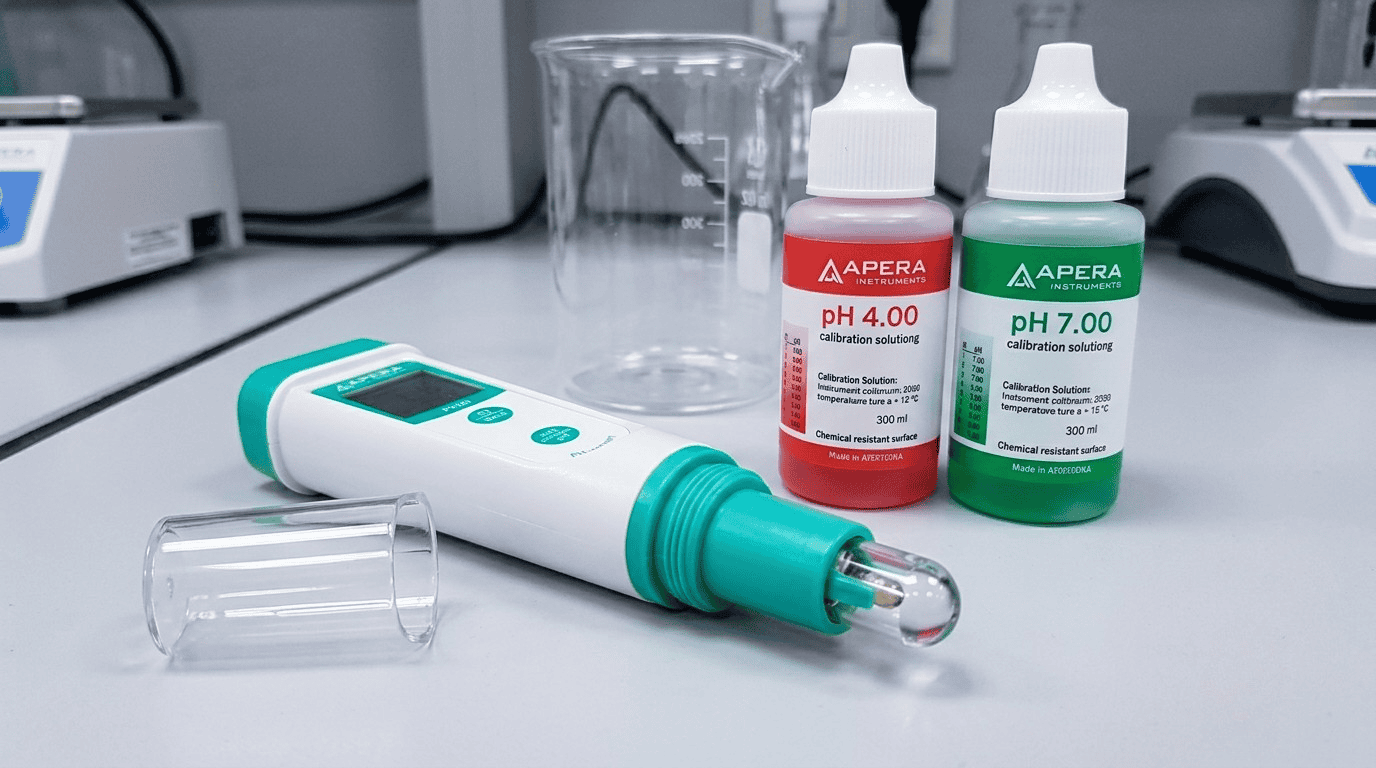
1. Apera Instruments PH20 Value pH Tester
Don’t let the word “value” fool you, this is the gold standard of affordable meters. It features a replaceable probe, three-point calibration, ATC, and accuracy of ±0.01 pH. The sensor is a lithium glass bulb that responds fast. It’s IP67 waterproof, which has saved me from spills involving yeast slurry. It’s around $45, and the probe alone costs about $25, making it a long-term companion. Perfect if you need one dependable workhorse.
Dr.meter PH838 0.01 Resolution pH Meter
This is a classic entry-level choice, often under $20. Accuracy is ±0.05 pH, with three-point calibration and ATC. The probe is non-replaceable, so treat it kindly. I’ve used this for kombucha and yogurt making. It works best in solutions with decent ionic strength; it can be a little jumpy in plain water. Still, for the price, it’s a steal and a great backup.
VIVOSUN pH and TDS Meter Combo
If you’re into hydroponics, this set gives you a budget pH meter and a TDS (total dissolved solids) meter for around $20. The pH meter is a simple, single-point calibration stick (yes, I said avoid that, but in this combo, many hydro growers swear by the consistency after a careful two-point calibration hack using screw adjustment).
For a dedicated bio-lab where you’re measuring different types of samples, I’d lean toward the Apera, but for a specific, repeatable hydro setup, this is a cheap and cheerful bundle.
GAIN EXPRESS Digital pH Meter
A robust, no-frills pen-style meter with two-point calibration and ATC. Accuracy is ±0.1 pH. The housing feels tougher than most at this price point (around $25). It uses a standard BNC connector, so you can replace the probe with a generic one—huge bonus. I’ve seen labs use these as beater meters for field work. The response is slightly slower in cold solutions, but it’s consistent.
Yieryi Digital pH Meter with 0.01 Resolution
This little orange gadget is often found on Amazon for under $15. It has ATC, two-point calibration, and auto-shutoff. The accuracy claims ±0.05 pH, but I’d treat it as ±0.1 for real work. It’s sensitive and needs careful storage. Great as a learner tool or for a kid’s science project. Just don’t drop it—the plastic cap is its only defense.
(Internal link: If you’re working with fermented foods, our guide [Safe Fermentation Practices for Home Bio-Labs] will help you use these meters correctly.)
The Cheapskate’s Secret: DIY Cheap pH Sensor Modules
When people ask me about the best cheap pH sensor for automation, I point them toward the humble analog pH probe kit. These are not handheld meters but bare circuit boards and a BNC probe that you hook up to a microcontroller.
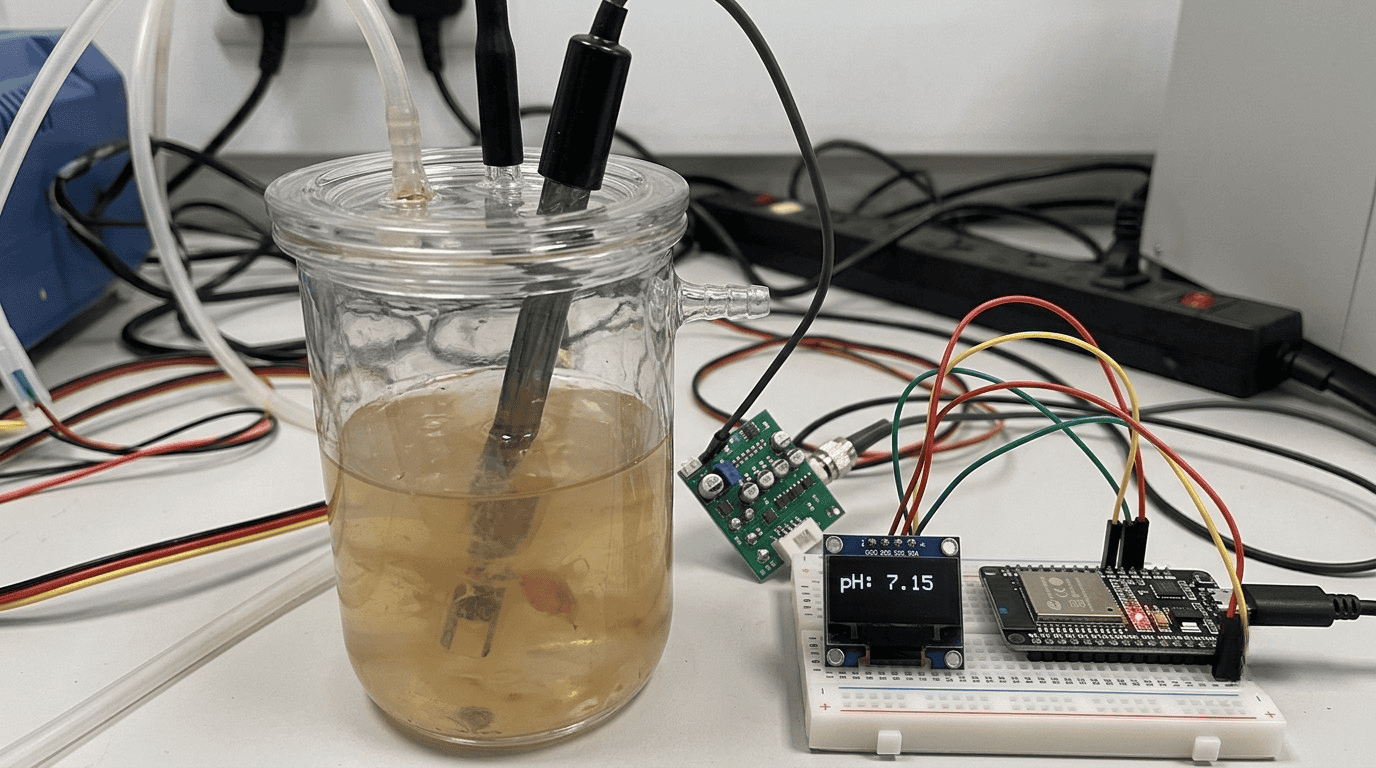
The most famous is the DFRobot Gravity Analog pH Sensor Kit, usually around $29. It includes a signal conditioning board and a general-purpose pH probe. You get a 0-5V analog output that directly maps to pH, and it runs on 3.3V or 5V, perfect for Arduino or ESP32.
There’s an even cheaper option: unbranded pH sensor modules from AliExpress or eBay that cost $10-15, including a board and a BNC probe. Quality is a dice roll, but I’ve had success by calibrating with buffer solutions and adjusting the offset in code. The probe life is shorter, but if you’re building a disposable bioreactor monitor, it’s a fun challenge.
Using a home bio-lab sensor like this, you can log pH data to a cloud dashboard, trigger a peristaltic pump to add acid/base, or just set up an LED warning when your cheese culture goes too sour. This is where your bio-lab crosses into full-blown bio-hacker territory.
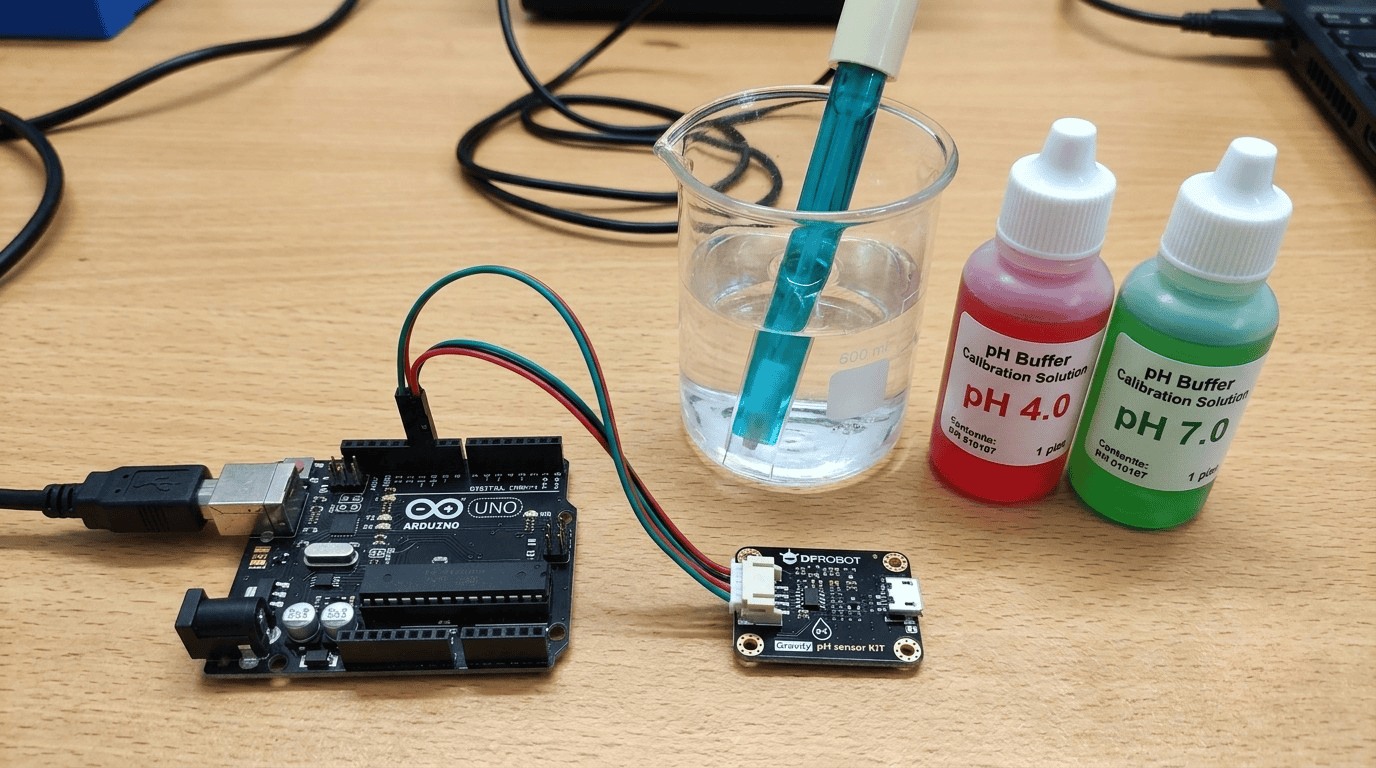
(External link: Check DFRobot’s official wiki for their [pH sensor calibration guide](https://wiki.dfrobot.com/PH_meter_SKU__SEN0161) — a lifesaver.)
How to Calibrate Your pH Meter Like a Pro (Even the Cheap Ones)
I’ve killed more budget pH meters than I care to admit by neglecting calibration. Don’t be me. Calibration isn’t a ritual; it’s the difference between “my pickles are safe” and “welcome to botulism town.” Here’s a dead-simple routine:
Get fresh buffer solutions. pH 4.01 and 6.86 (or 7.00) at least. Don’t use old, moldy buffer, contamination ruins everything. I buy small single-use pouches or keep the bottles in the fridge and pour out a little into a clean cap, never dipping the probe directly into the stock bottle.
Rinse with distilled water between solutions and blot gently (don’t rub the glass bulb).
Go two-point first. Follow your meter’s instructions. For the analog cheap pH sensor, you’ll measure voltage at pH 4.01 and 6.86, then plug the slope and intercept into your code. (I’ll do a deep-dive code post soon.)
Test with a known sample, like tap water or a fresh buffer, to see if the reading makes sense.
Check weekly. If you use it daily, calibrate every two weeks. If you drop it, recalibrate immediately.
Proper storage is equally vital. Never let the glass bulb dry out. Use 3M KCl storage solution (cheap and available online). Storing in distilled water will leach ions from the reference electrode and destroy the probe. If you lost the storage solution, pH 4.0 buffer is an emergency alternative. I’ve kept a Dr.meter alive for three years with just that habit.
(Internal link: Read our [Essential Lab Safety and Maintenance Checklist] to keep your gear in shape.)
Common Mistakes That Murder Budget pH Meters (and How to Avoid Them)
I’ve made every mistake on this list so you don’t have to. Here’s how to keep your budget pH meters from an early grave:
Stabbing the probe into solid samples. The glass bulb is delicate. Don’t jam it into a potato or hard cheese. Blend or macerate samples into a slurry with distilled water instead.
Measuring boiling liquids. High temperature damages the glass bulb and throws off the reading. Let samples cool to room temperature. ATC compensates for mild temp differences, not thermal shock.
Neglecting the junction. The ceramic junction can clog with oils or proteins. Soak in warm water with a bit of mild detergent, then rinse thoroughly. For stubborn clogs, a 0.1M HCl soak works, but check if your probe is acid-safe.
Using a dry meter. If you accidentally let a probe dry out, soak it in storage solution for 24 hours. It might revive. If calibration still drifts wildly, it’s time for a new probe or meter.
Expecting perfection from a $12 sensor. A cheap pH sensor module from a no-name brand may have a non-linear response at extreme pH. Characterize it with multiple buffer points, and accept that your plant watering system doesn’t need 0.01 pH accuracy.
(External link: The Electrochemical Society has a great primer on [how pH electrodes work](https://www.electrochem.org/dl/interface/spr/spr08/spr08_p30-32.pdf) if you want to geek out.)
Building a Semi-Automated Home Bio-Lab with Cheap pH Sensors
Imagine a setup where your continuous kombucha brew monitors its own pH and tweets at you when it’s time to bottle. With home bio-lab sensors and some tinkering, it’s entirely doable. The typical flow: analog pH sensor kit → microcontroller (ESP32) → MQTT → Home Assistant or a simple Node-RED dashboard.
You can add a relay to a pump for automatic pH adjustment. A cheap peristaltic pump from an eBay vendor and a 3D-printed enclosure, and you have a mini-bioreactor.
I’ve seen folks in the DIY bio community build algae photobioreactors where budget pH meters control CO₂ injection. The key is electrically isolating the pH circuit to avoid ground loops—the DF Robot board has decent isolation, but the super cheap modules may need a separate isolated DC-DC converter for accurate readings. Don’t let that scare you; start with just logging data, and you’ll learn a ton.
(External link: SparkFun’s tutorial on [pH sensor hookup](https://learn.sparkfun.com/tutorials/ph-sensor-hookup-guide/all) is beginner-friendly and includes code.)
Summary: Finding Your Perfect Home Bio-Lab pH Companion
We’ve covered a lot of ground, so let’s bring it together. You don’t need to spend a fortune to get reliable pH measurements for your projects. Here’s a quick decision cheat:
Best overall budget pH meter for serious hobbyists: Apera PH20. Replaceable probe, accurate, waterproof. (~$45)
Best ultra-cheap handheld for beginners: Dr.meter PH838 or Yieryi. Under $20, just treat it gently.
Best cheap pH sensor for microcontroller projects: DFRobot Gravity Kit. It’s supported by a huge community and tons of code libraries. (~$29)
For strict hydroponics or brewing: Consider the VIVOSUN combo if you’ll also measure TDS, but prioritize calibration.
Remember, a cheap pH sensor can give you data that transforms your understanding of biology, but only if you maintain it. Calibrate often, store the probe wet, and don’t be afraid to hack a solution together. The home bio-lab movement is all about accessible science.
By choosing the right home bio-lab sensors, you’re not just following a recipe, you’re becoming a true practitioner, someone who understands why that fermentation bubbled, why your plants thrived, and why your cheese tasted like heaven instead of feet.
Let’s Keep the Conversation Going
I hope this guide helps you pick the perfect budget pH meters and home bio-lab sensors for your next big (or tiny) experiment. I’d love to hear what you’re building. Have a favorite cheap sensor I missed? Did you resurrect a probe from the dead? Let me know!
For personalized advice, collaboration inquiries, or if you just want to share your lab bench setup, shoot us an email. We’re building a community of curious makers, and your questions often spark the next blog post.
Contact us at [[email protected]] for inquiries, sensor recommendations, or just to say hi. Let’s grow something amazing together.